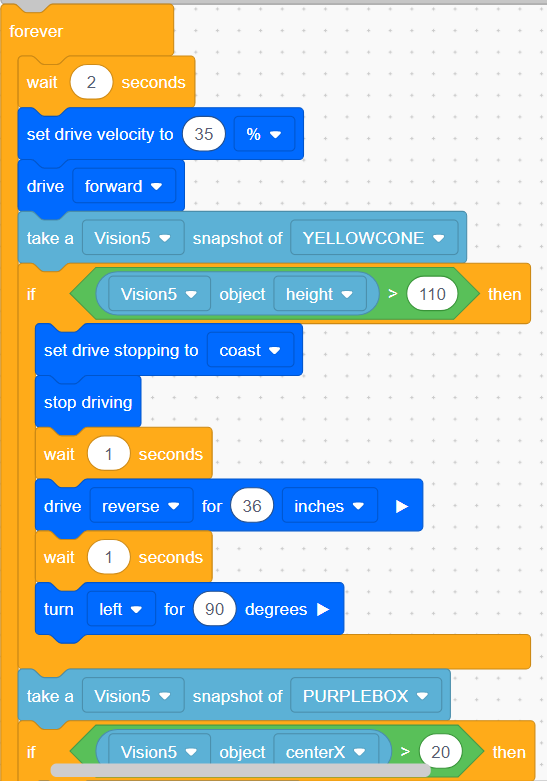
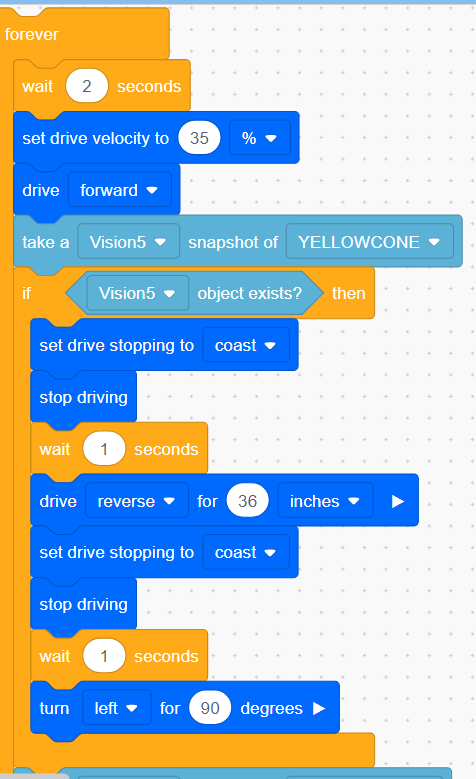
Vision Sensor

Train the Sensor
(Never use premade/default color settings...always define your own.)
Ask Mr. Harrington to set up a "White Background & Base " for you. This will help you Train the Sensor to recognize the Pure Colors.

  1. Open VexCode V5 Block
  2. Connect the Vision Sensor with a USB cable to your computer.
  3. Open the Device Menu, and select: "Add A Device" / Vision / Port (match with Brain port) / Title it (see 3a. below) / Configure.
  4. Aim Sensor at colored object.
  5. Press "Freeze."
  6. Click and drag a square over the object.
  7. Check "Set". You will see Transparent Cover over the object.
    1. If there is not much coverage, use the "Slider" to increase or decrease coverage. The goal is to have the 'Fog' cover the object's color and nothing else.
    2. You may want to move the object closer to the Vision Sensor to activate the "Set" boxes (Green!).
  8. Select Freeze a second time...this will unfreeze the screen.
  9. Saving? There is no Save Button...so close the window and it will save it to the actual Vision Sensor.
    1. Also, select "Done" prior to leaving the Device Menu. This is necessary, or else your changes will not be applied to your program.
    2. Always "Save" prior to quitting the VexCode V5 Blocks program.

Program the Robot/Sensor.

Rule: Always start simple until you achieve Success...and then build upon your Simple success!

    1. Write a very simple program that tests just one color. (I recommend Yellow or Orange), and then do the other colors. If a color like Purple does not work...go back to the Device Menu and reset the Vision Sensor to be able to see the color.
      • Note: stack the colored blocks and cones exactly 4 cones/blocks high.
    2. When it works, then begin writing the same program for the other colors.
    3. When you have successfully written a program for each color, now combine all of them into one program.

Programming Hints: