 |
| These video tutorials match the skills taught in the classroom. Each segment below corresponds to the gradesheet provided to the students. |
| Preparation: |
A. Overview
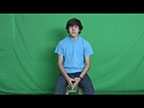
- You have already learned how to create a Green Screen effect. You just finished filming your "Green Screen Intro." In this lesson, you will import the film to Final Cut Pro and then apply your Green Screen skills to your film. (video) (You Tube)
|
| Training: |
Step #1: Acquire Photos.
- 1a. Get 5 to 6 images that will appear in the place of the green screen behind you as you are talking. (video) (You Tube)
|
The Steps Shown Below Match Exactly the Steps & Skills You Learned
Previously While Recreating the Model Green Screen with Mrs. K!
If you know what you are doing...just follow the Gradesheet.
If you need guidance, just click on the link to the video.
The only new addition is a tutorial showing you how to import
film from the class camcorders into Final Cut Pro in Step #2
|
| Step #2: Create a New Project - Import Your Green Screen Film into Final Cut Pro
|
Step #3: Drag the Video & Photos onto the timeline:
- 3a. Drag the video and photos onto the timeline and add titles and transitions. (video) (You Tube)
|
Step #4: Removing the Green Screen Background & Adding Background Images and Music.
- 4a. Line up the background images and remove the green background. Add music and adjust the volume when someone speaks. (video) (You Tube)
|
| |
|
You are going to spend the next few days working on your Wood Drawing. During this time, each student will return to be filmed in front of the green screen where you will provide your explanation of what your film is about. You will then import your Green Screen film to Final Cut Pro where you will apply each of the edits you learned above. |